Setting up a VPN connection using Windows 10
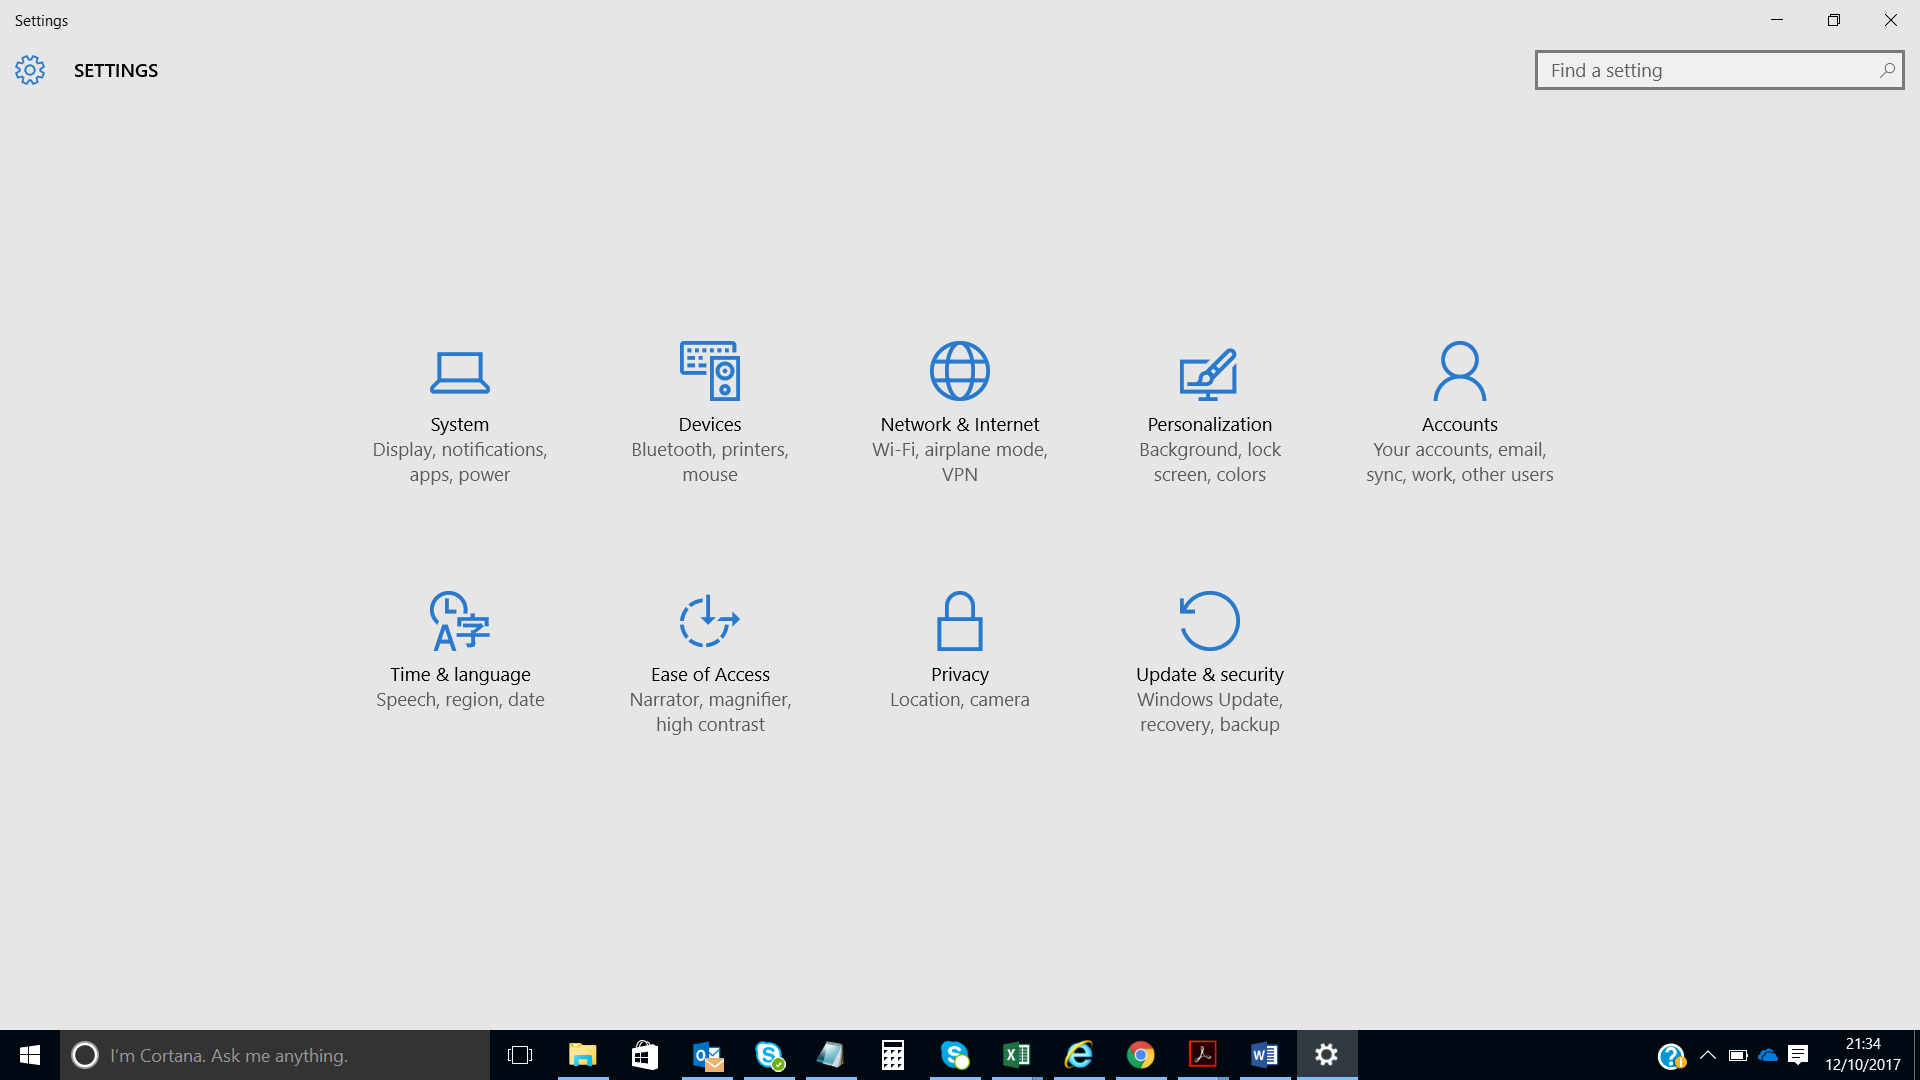
1. Go to Settings screen as shown and choose the option highlighted in RED
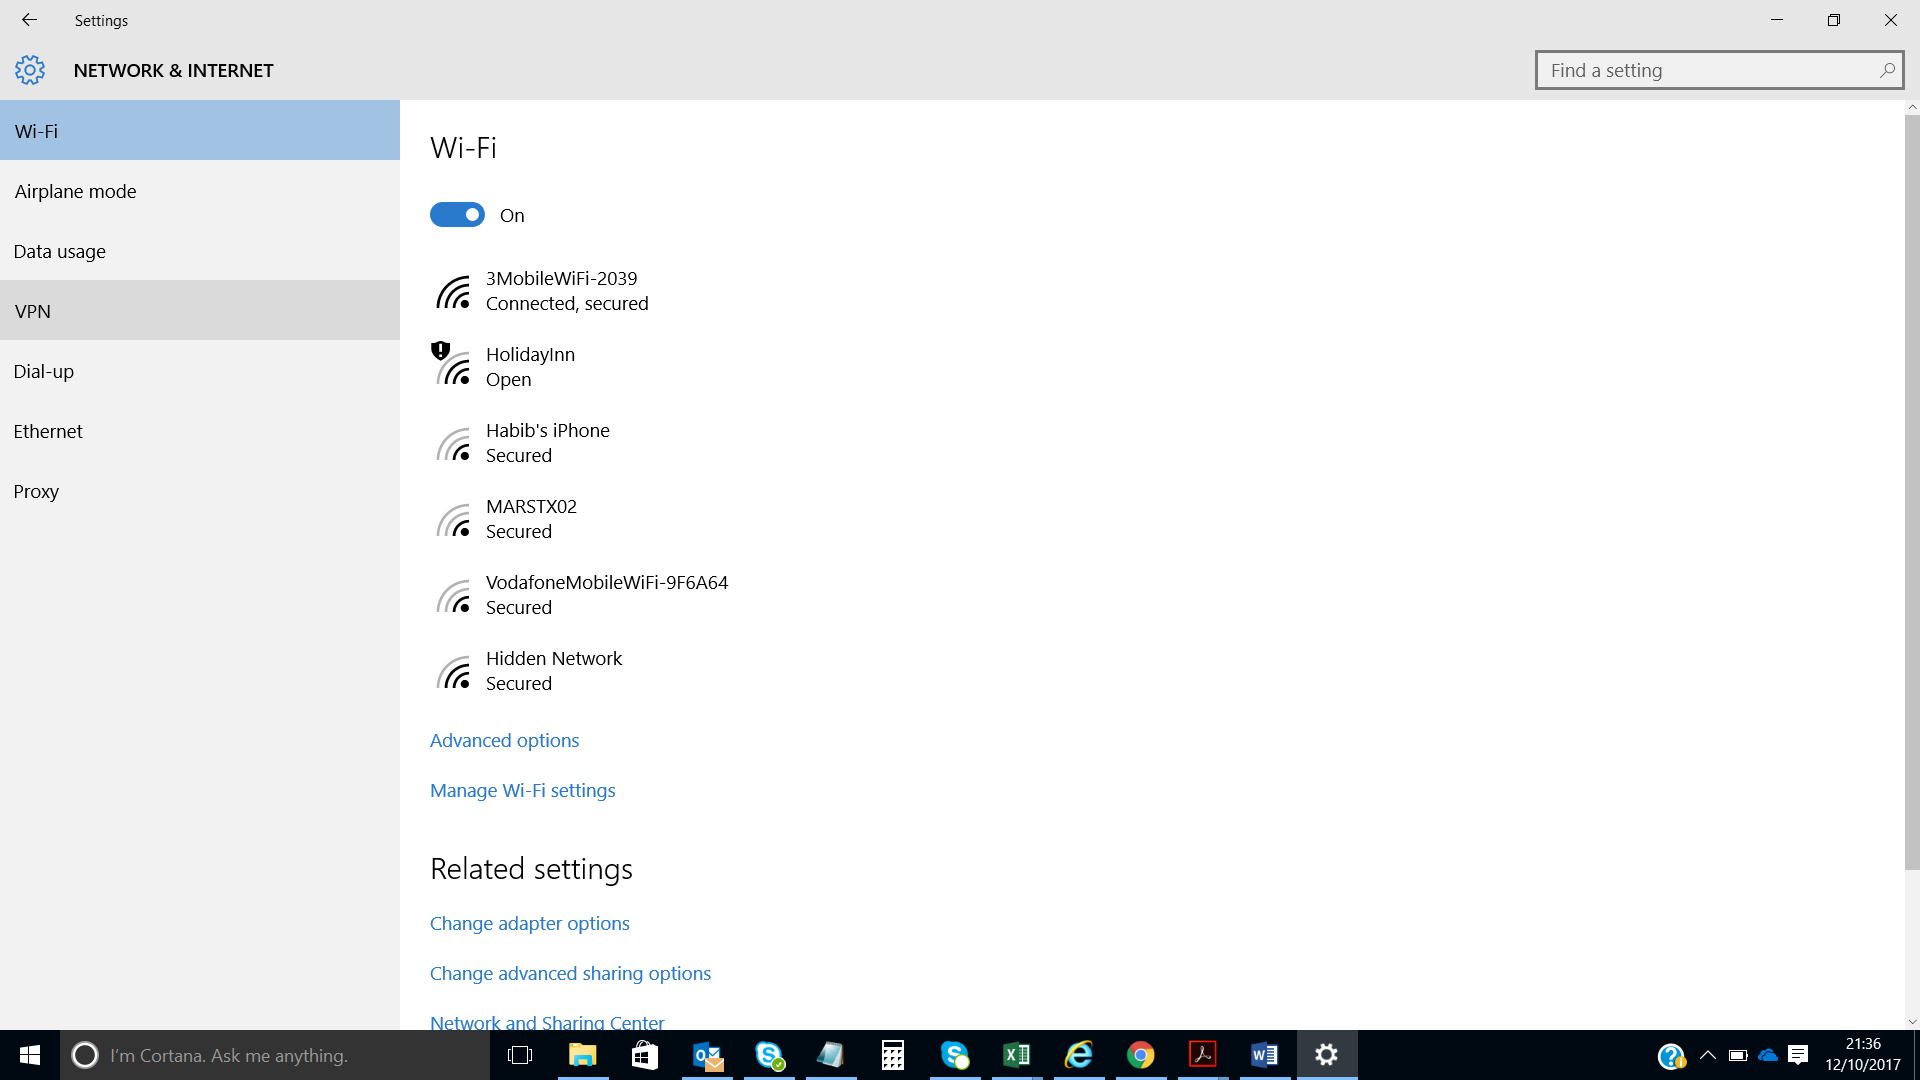
2. Choose the VPN option.
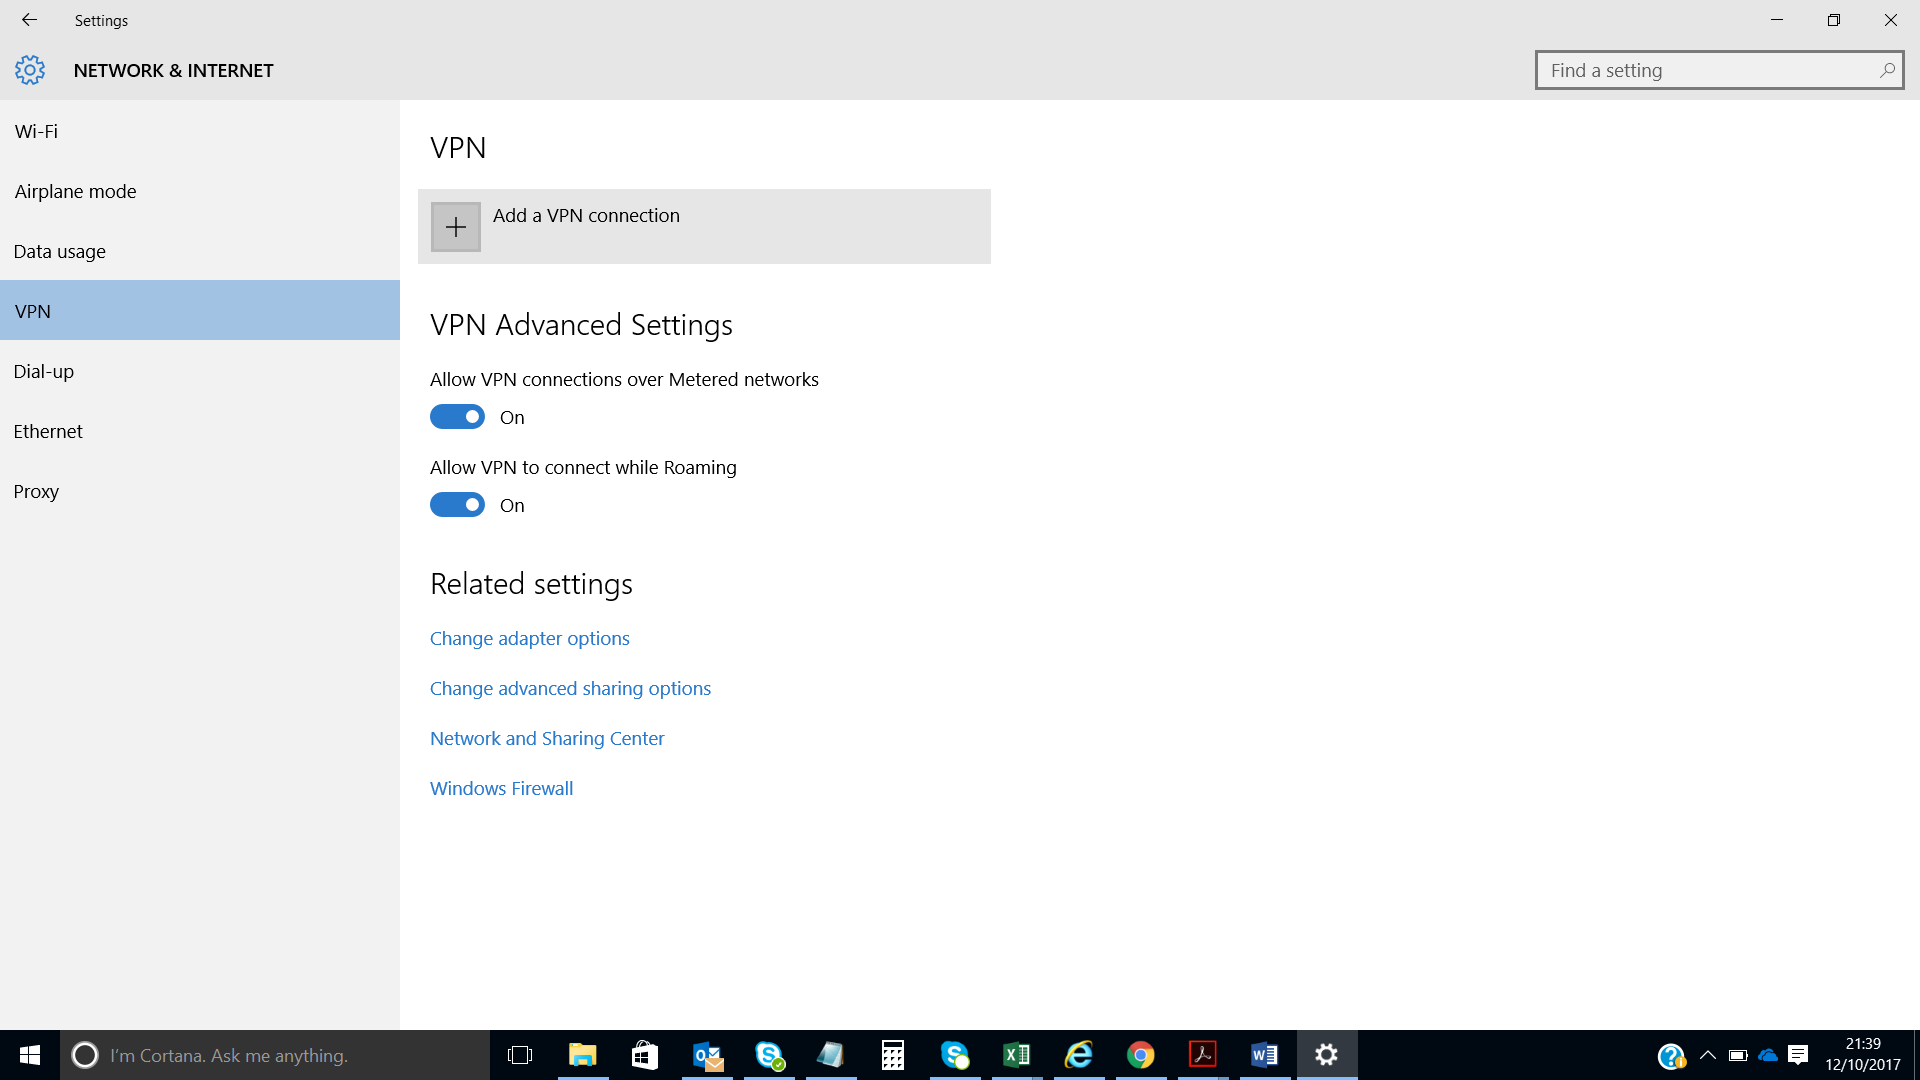
3. Choose the VPN option shown on left and choose the Add a VPN connection (see the VPN Advanced Settings which shows as On (options are highlighted in RED)
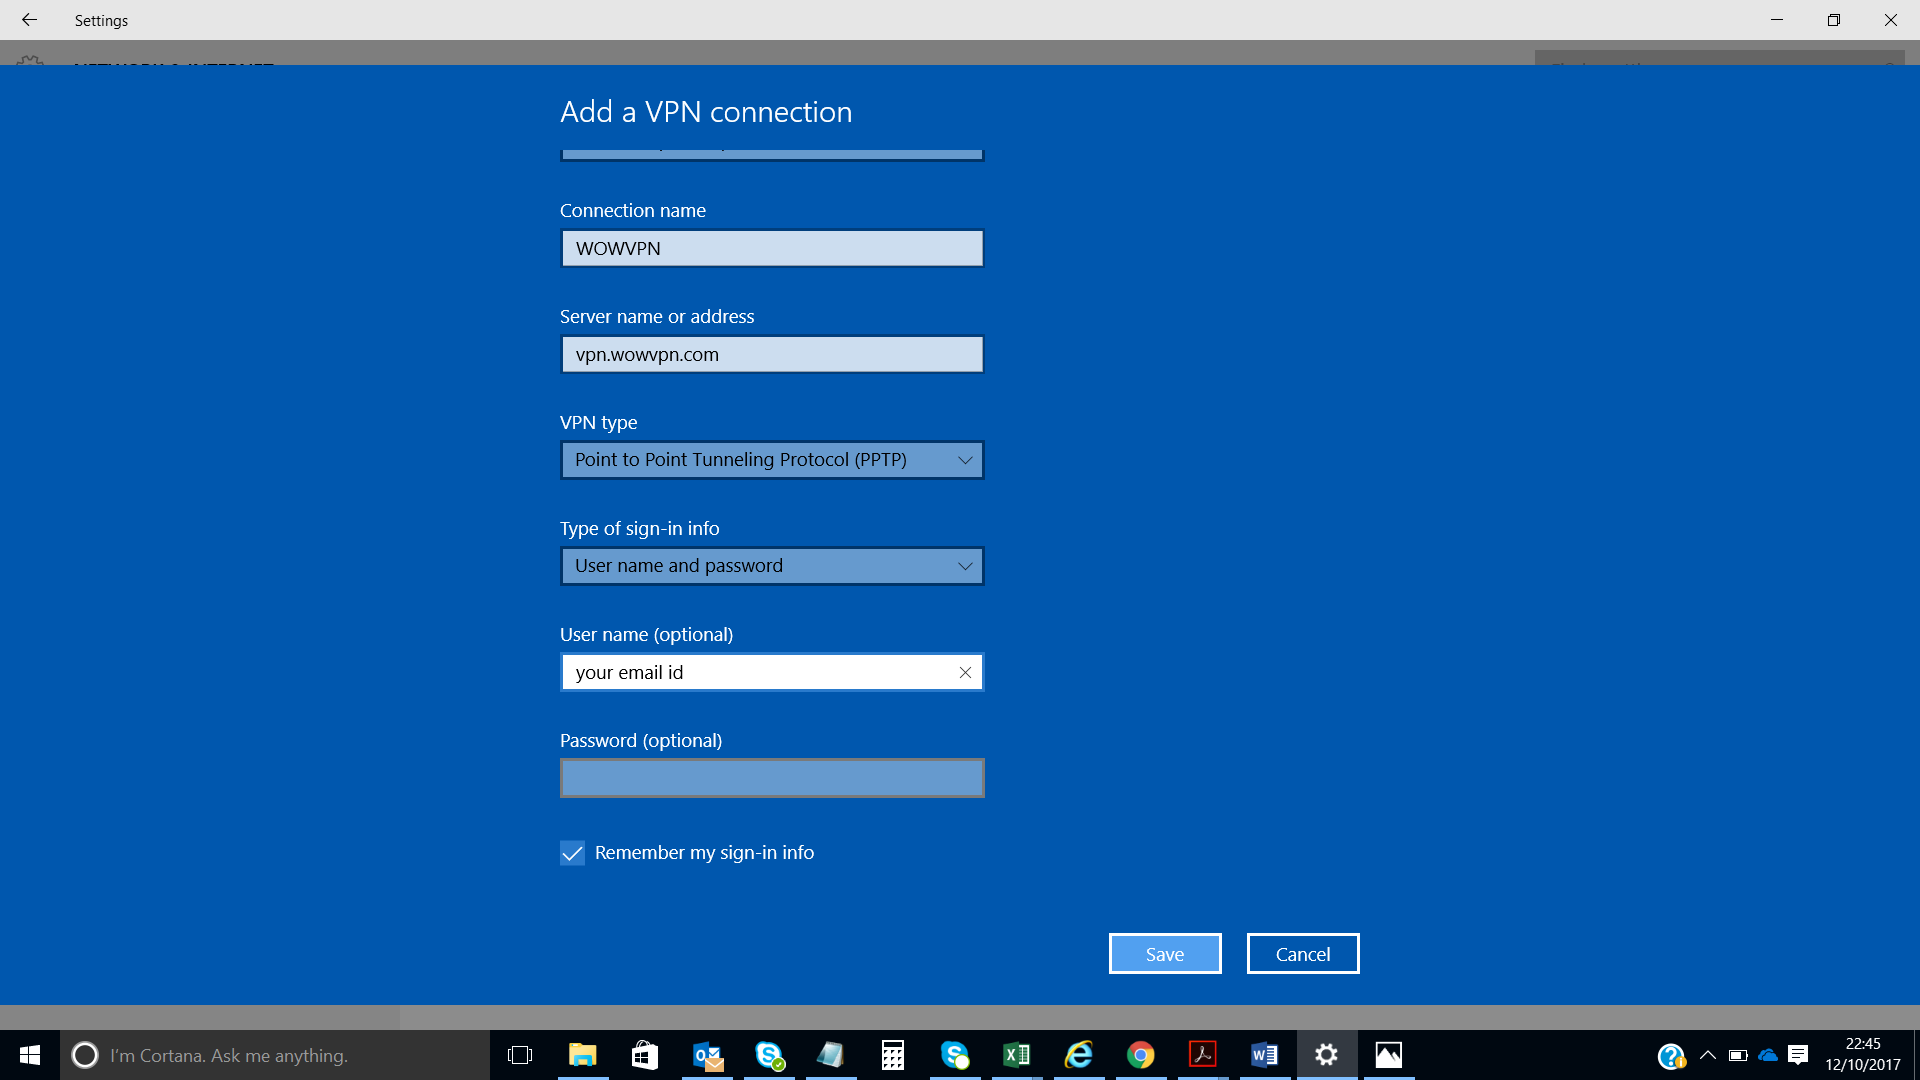
4. Choose the details as shown in the screen below . The username will be your email id and password will be the password you selected.
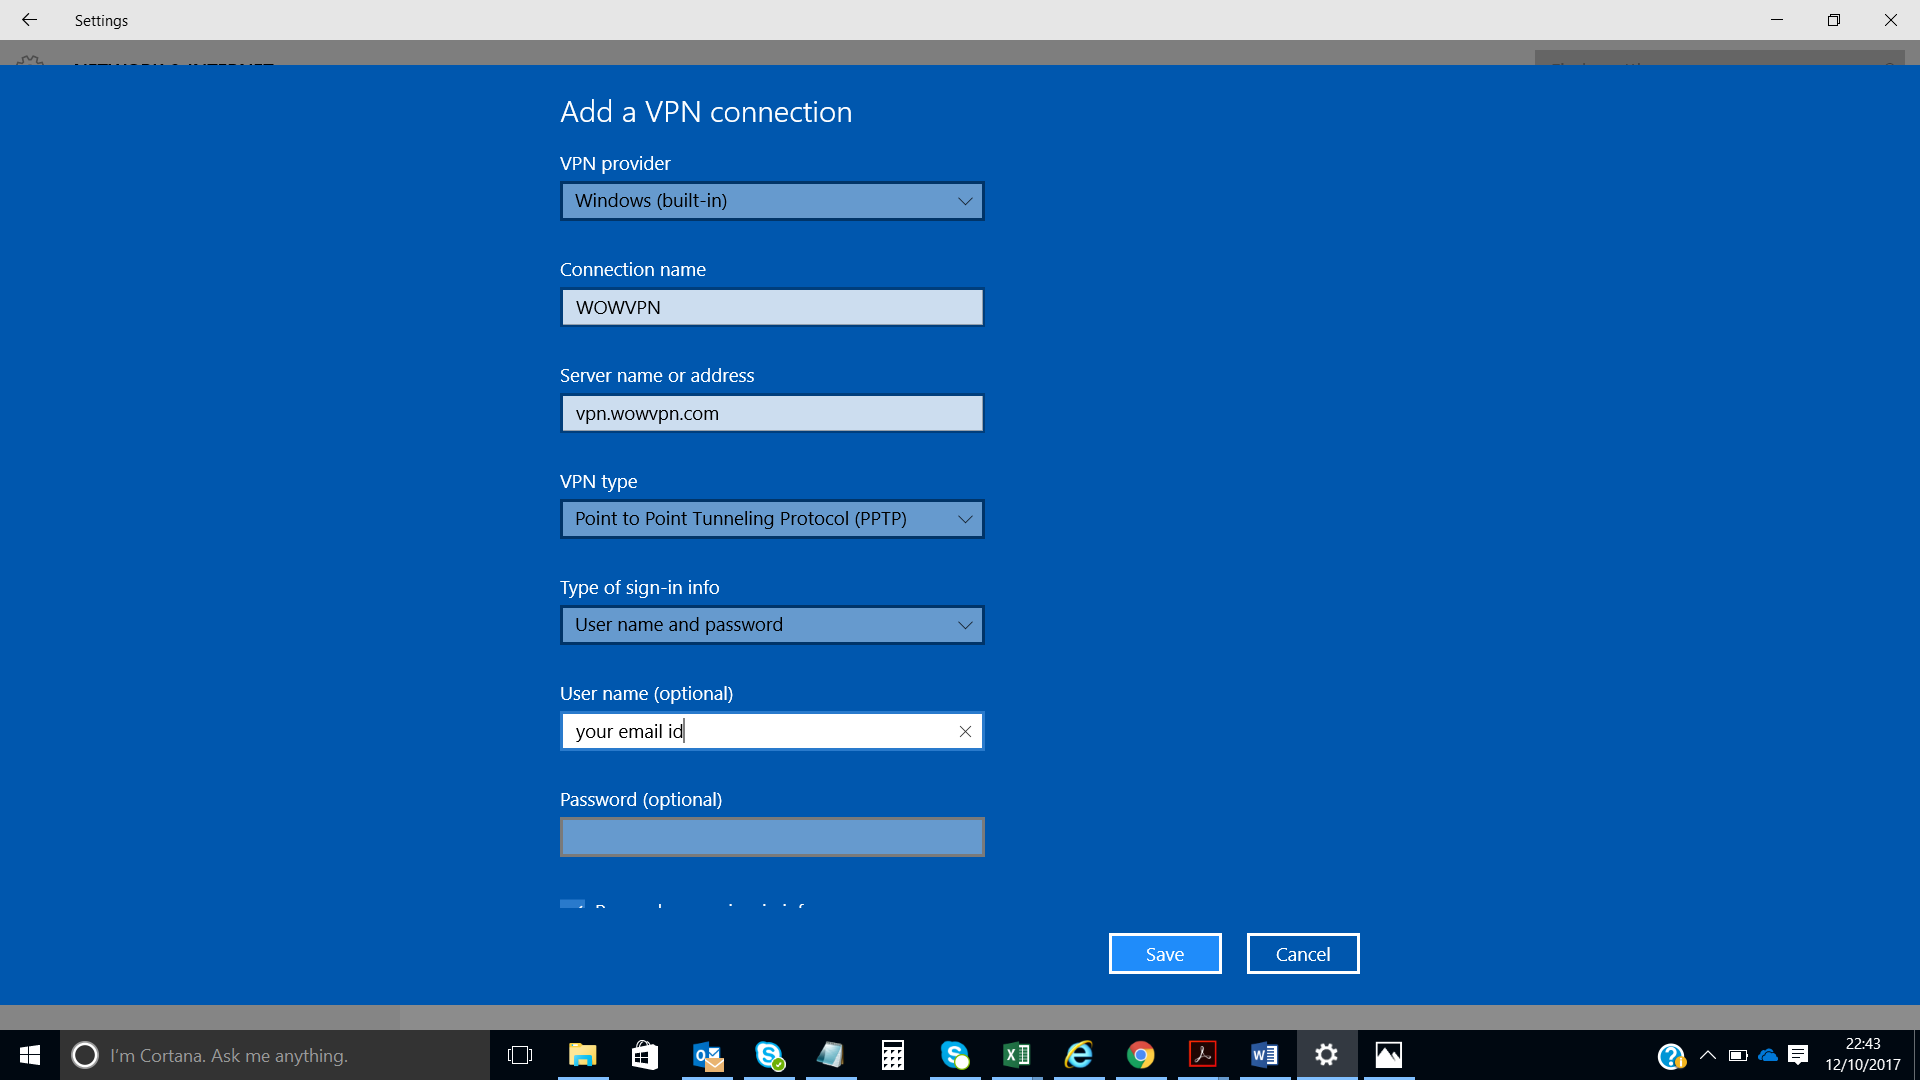
5. Choose the check box to remember your user details and Save the connection
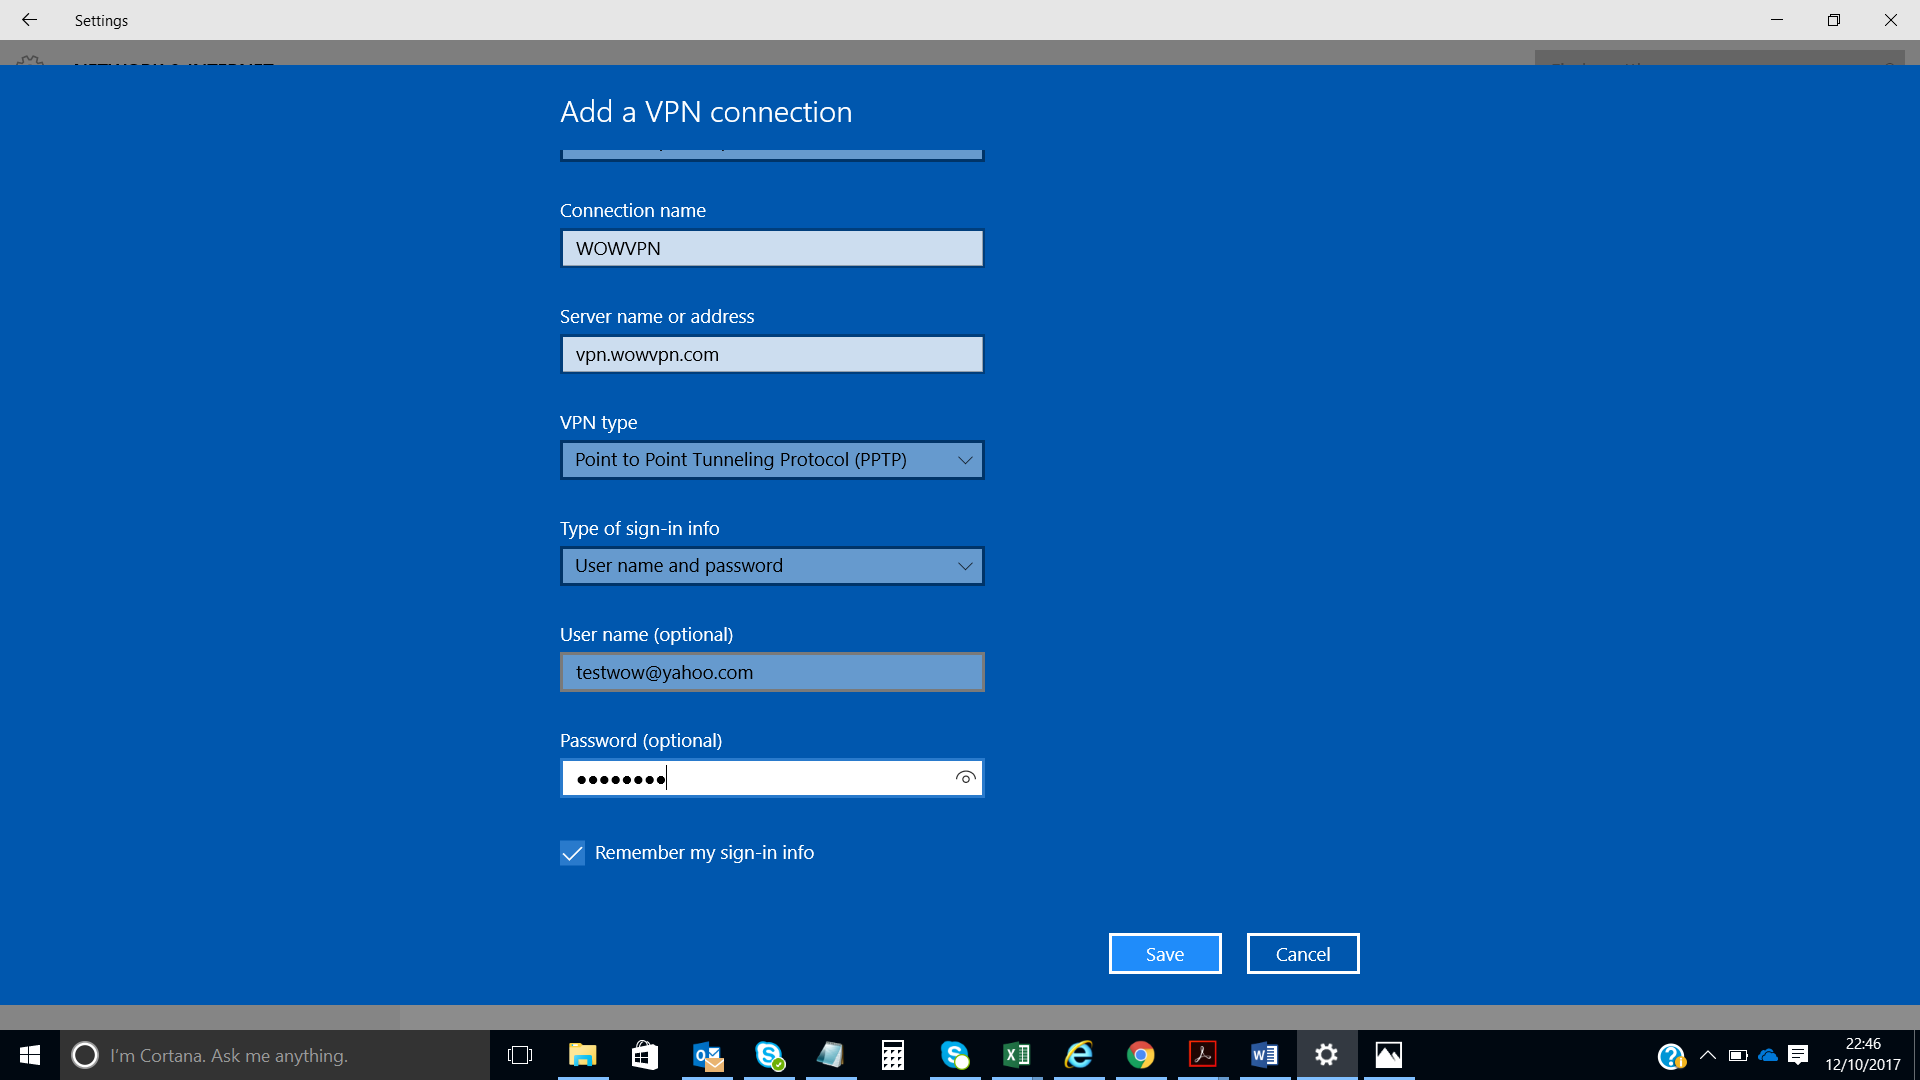
Example shown below with username as testwow@yahoo.com
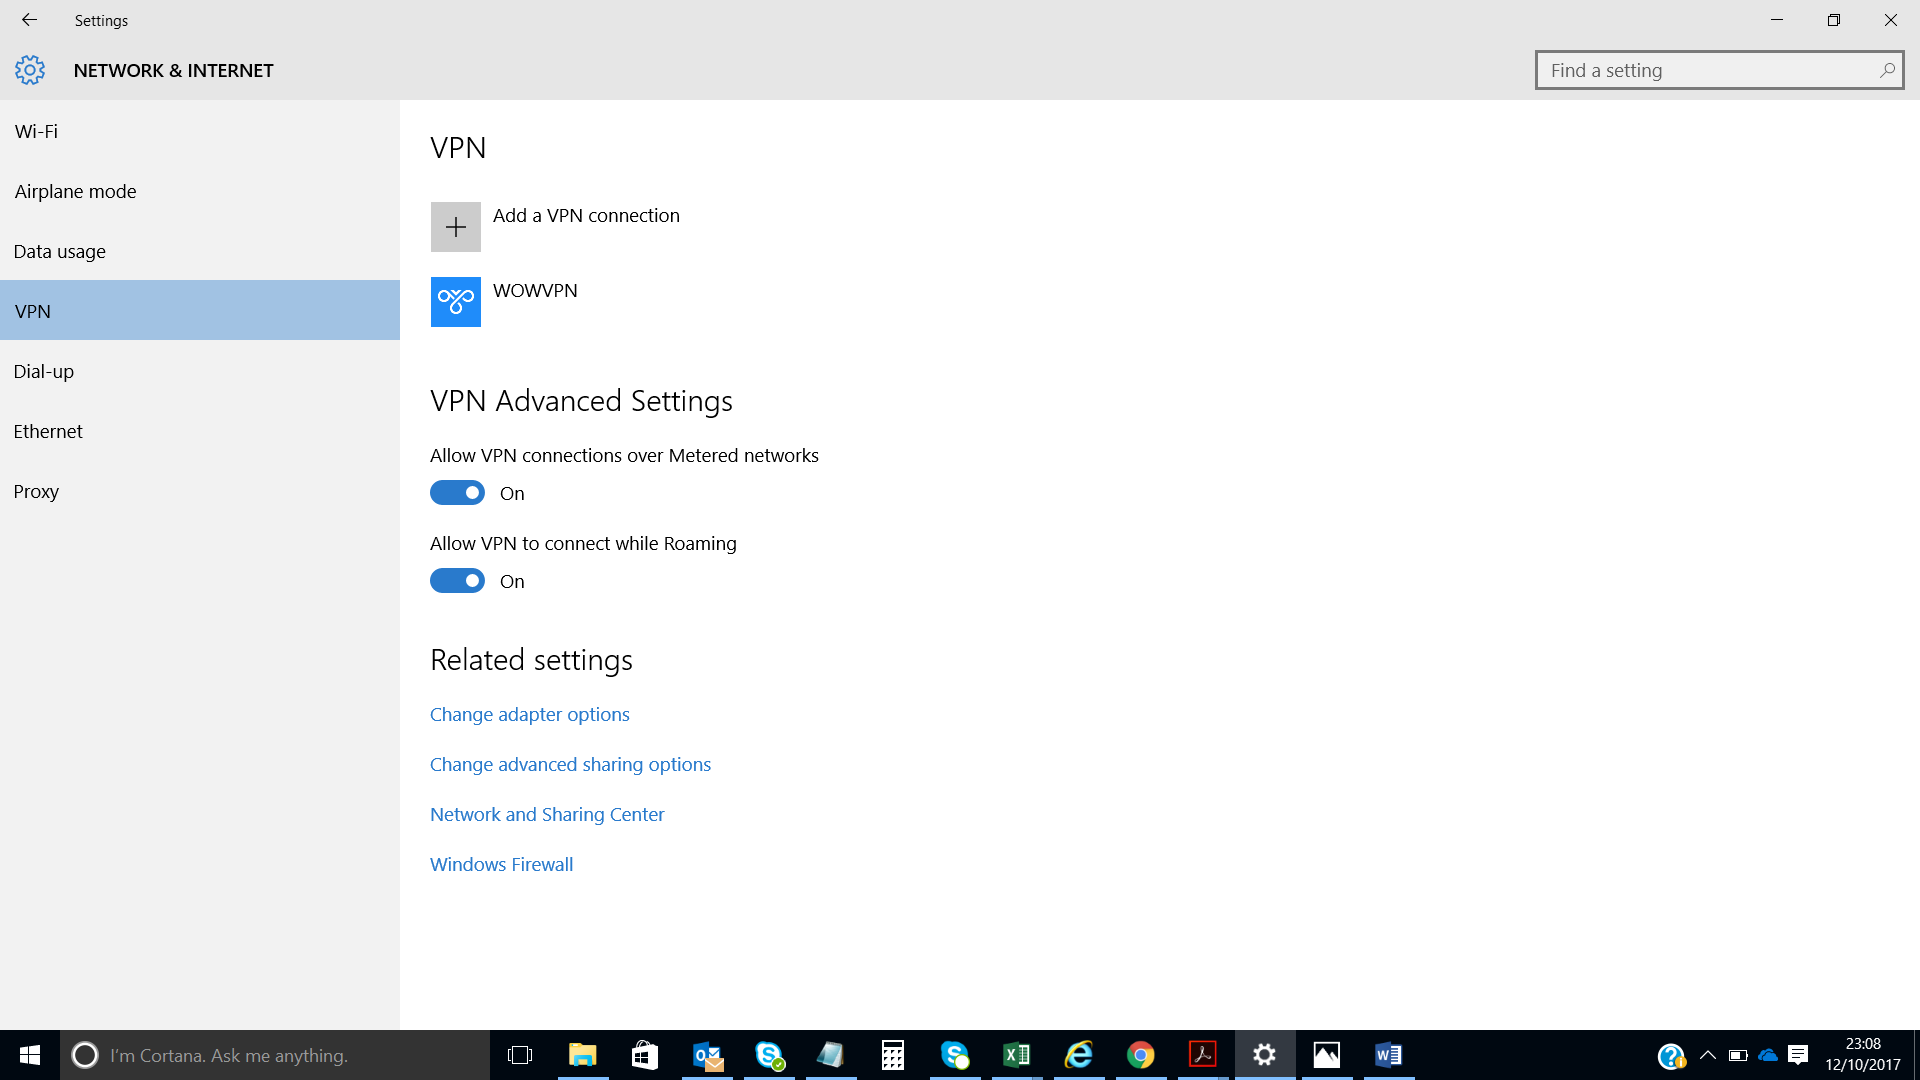
6. After Save is done . You should see the WOWVPN connection in your list under VPN
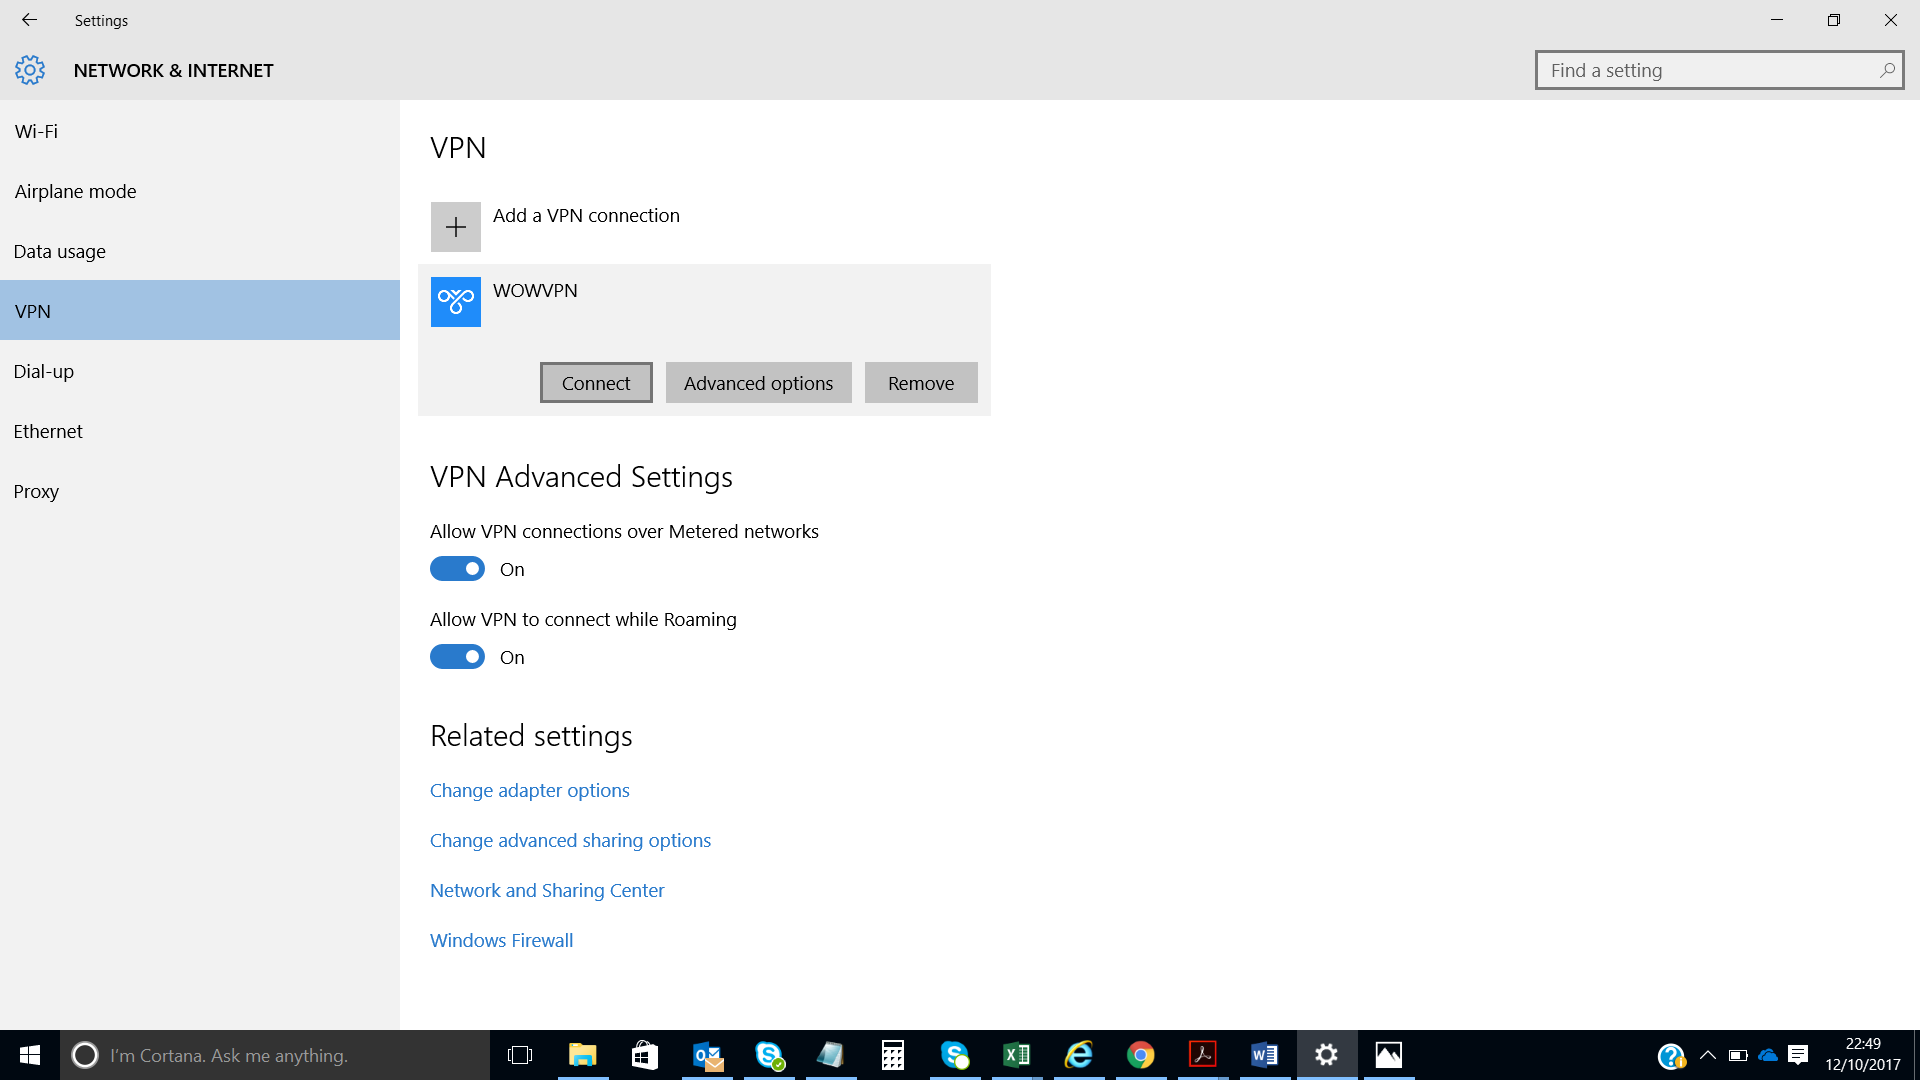
7. Click on the WOWVPN connection shown and press connect to connect to VPN anytime
8. The VPN connection will be established as shown below.
