


HELP & SUPPORT

The WOW VPN service allows you to reliably route your internet traffic via the WOW VPN servers based in the UK.
Follow this guide to easily setup a WOW VPN connection using Windows 7.
Setting up a VPN connection using Windows 7
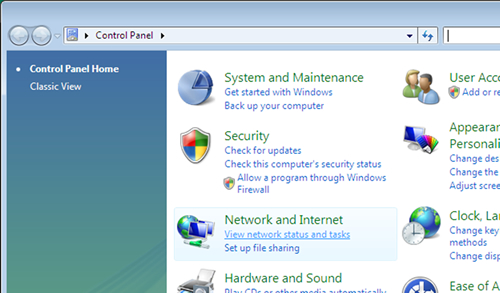
To get started click the Windows icon in the bottom left hand corner of the screen (where the "Start" button used to be) then click on "Control Panel".

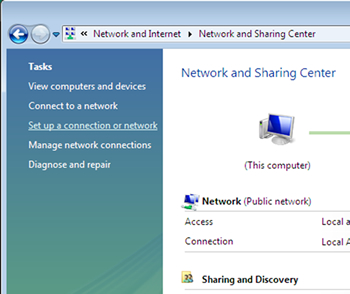
Click on "View network status and tasks".
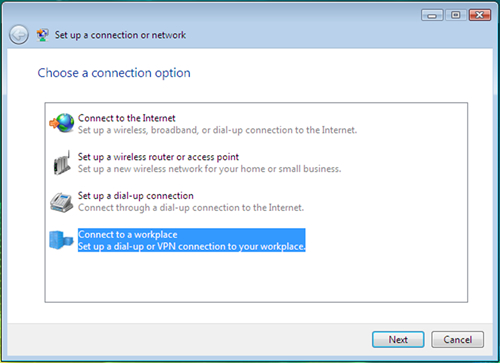
Click on "Set up a connection or network".
Click on "Connect to a workplace" (you may have to scroll down) and then click "Next".
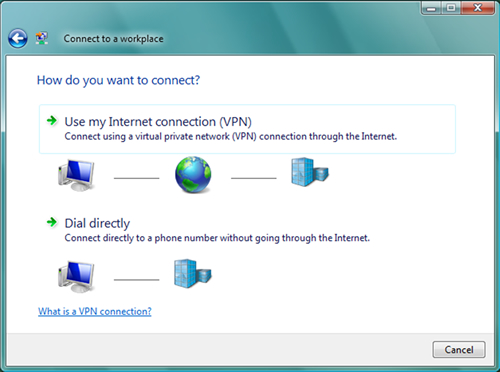
Click "Use my Internet Connection (VPN)".
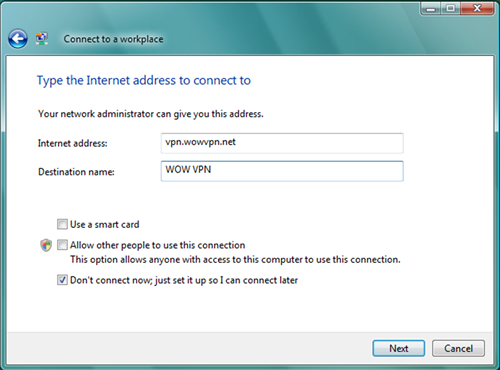
Enter the following information:
Internet address: vpn.wowvpn.com
Destination name: WOW VPN
Tick the box for "Don't connect now" and click "Next".
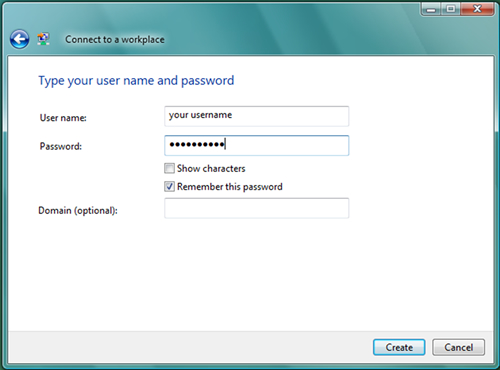
Enter your username and password, tick the box to "Remember this password" (unless you want to type it in each time you connect) and click "Connect".
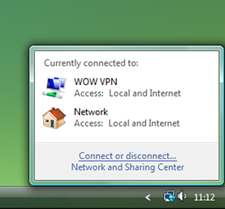
You will get a screen saying that the connection is ready to use. Click on "Connect Now" and you will be connected to WOW VPN.

Remember to disconnect when you are not using WOW VPN as your internet connection speed may be faster without it.
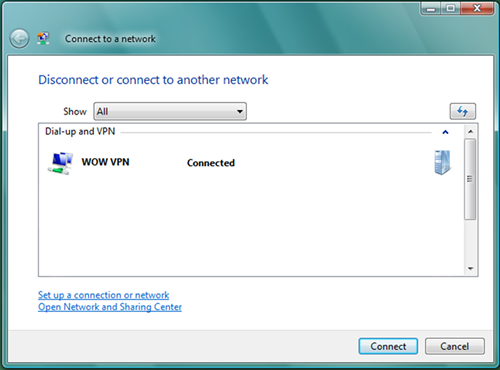
To do this click on the network monitors at the bottom right of your task bar, then click on 'Connect or disconnect...'
You can now disconnect from WOW VPN by clicking on the connection, then clicking on Disconnect.
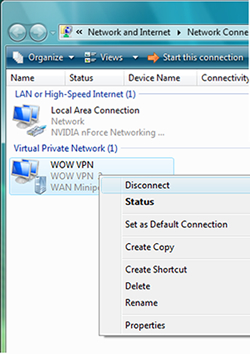
If you'd like to be able to start the VPN connection easily in the future you can make a shortcut on your desktop.
Open "Control Panel" then click on "View network status tasks", and then "Manage Network Connections". Right-click on the WOW VPN connection and choose "Create Shortcut"..
You will get the message below, choose "Yes".
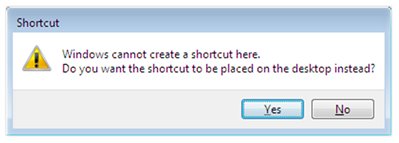
Now you'll have an icon on your Windows Desktop you can click on to get connected.