


HELP & SUPPORT

The WOW VPN service allows you to reliably route your internet traffic via the WOW VPN servers based in the UK.
Follow this guide to easily setup a WOW VPN connection using Windows 8.
Setting up a VPN connection using Windows 8
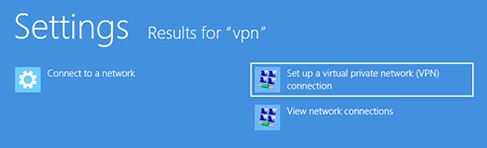
To get started open up the Search window by pressing (Win+W) keys and search for VPN.
Select 'Set up a virtual private network (VPN) connection'.
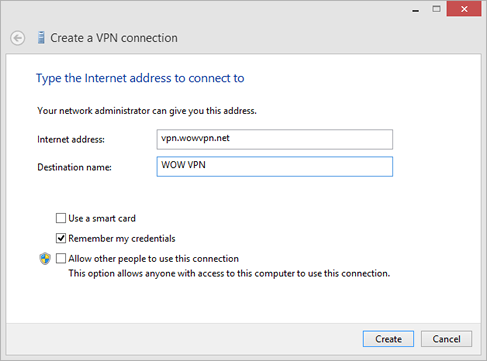
On the 'Create a VPN Connection' page enter the following information:
Internet address: vpn.wowvpn.com
Destination name: WOW VPN
Then click 'Create'.
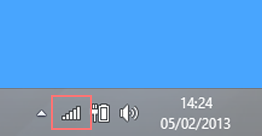
You will be returned to the desktop, click your network icon at the bottom right corner of your desktop.
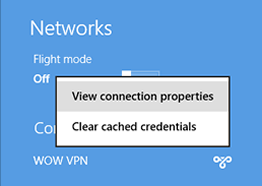
Right click on the WOW VPN connection and choose 'View connection properties'.
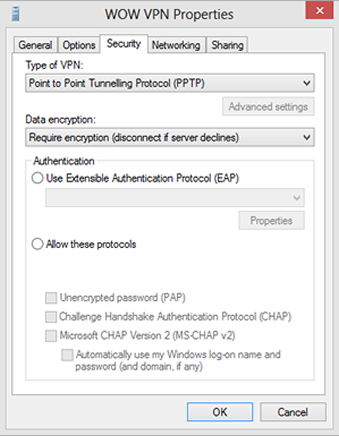
The properties window will now be displayed. Click on the Security tab and change the Type of VPN from Automatic to "Point to Point Tunneling Protocol (PPTP)" and click OK.
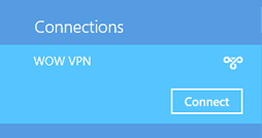
Click your network icon at the bottom right corner again, then click on the WOW VPN connection and Connect.
You will now be prompted to enter your WOW VPN username and password. Enter them and click OK.

The VPN will attempt to connect to our servers.
If successful, the VPN status will change to Connected, you can now browse the internet using WOW VPN.

To disconnect from WOW VPN click on the connection, then click on Disconnect.

Your settings will be saved so next time you wish to connect to WOW VPN, simply click on the network icon at the bottom right hand corner of your desktop, then click on the WOW VPN connection.